July in the Mountains – Waptus River

Repost from Adventures with Packraft

Kirk and I had the first week of July slated for a week of vacation, and we still hadn’t decided on where to go until the day before we left.I figured: draw a 10-hour driving circle around Bend (I didn’t want to drive farther than that), but turns out that includes the whole Pacific Northwest. Not much help.

We looked at packrafting the Bruneau and Jarbidge rivers in SW Idaho, but at low flows the rocks are reported to be tearrrrifying…tear…if..ying…tear. No thanks.

We thought about the Olympics, but we would be looking at a 4,000’ climb to get up the good alpine stuff, and we weren’t feeling THAT ambitious.

We thought about rafting the lower main Salmon River, but it is a very popular stretch, and open to jet boats… With July 4th happening during our week off, we knew it would be one of the busiest vacation weeks of the summer.

So, when Kirk came up with a combo backpacking and packrafting trip in the Alpine Lakes Wilderness in Washington, it sounded perfect. I had hiked through the Alpine Lakes area 12 years ago on the Pacific Crest Trail, but that September the whole stretch was drenched in rain and fog and I really didn’t see much. I was excited to go back and hike a little bit on the trail, check out some high alpine lakes, and do some packrafting.

It was hard to decide where to go even then. The area is massive and so full of mountains, rivers, lakes and trails that it really makes Central Oregon and our Cascade range look like child’s play.

We let the rivers decide where we would go.

We drove to Cooper Lake on Friday and camped on the side of the road (Washington has so many free roadside campsites!). Kirk has been checking out the Cooper River, a short, stout whitewater run, that was over my head, so next we drove up the Cle Elum River. It looked promising, then we hiked in to the river Kirk really wanted to check out, the Waptus.

We were worried it wouldn’t have enough water, but when we got to the confluence, it looked doable. It would be a mellow river with a few gorges…unknown gorges involving extensive scouting… so it would be a real adventure!

We left the parking lot with a week’s worth of food, boats, backpacking gear, and if we had weighed our packs I bet we were both tipping 60-70 pounds. It was painful. So painful that I wasn’t sure my body could do it, and I have rarely felt that! We were to hike in 9 miles with the full load. Eeeeeee!

We made camp the first night about 4 miles in at the top of one of the gorges with what looked like a fun granite slide and drop. We had already passed a waterfall with a series of no-go drops, so we already knew the river would hold more surprises, and we would have to portage some stuff.

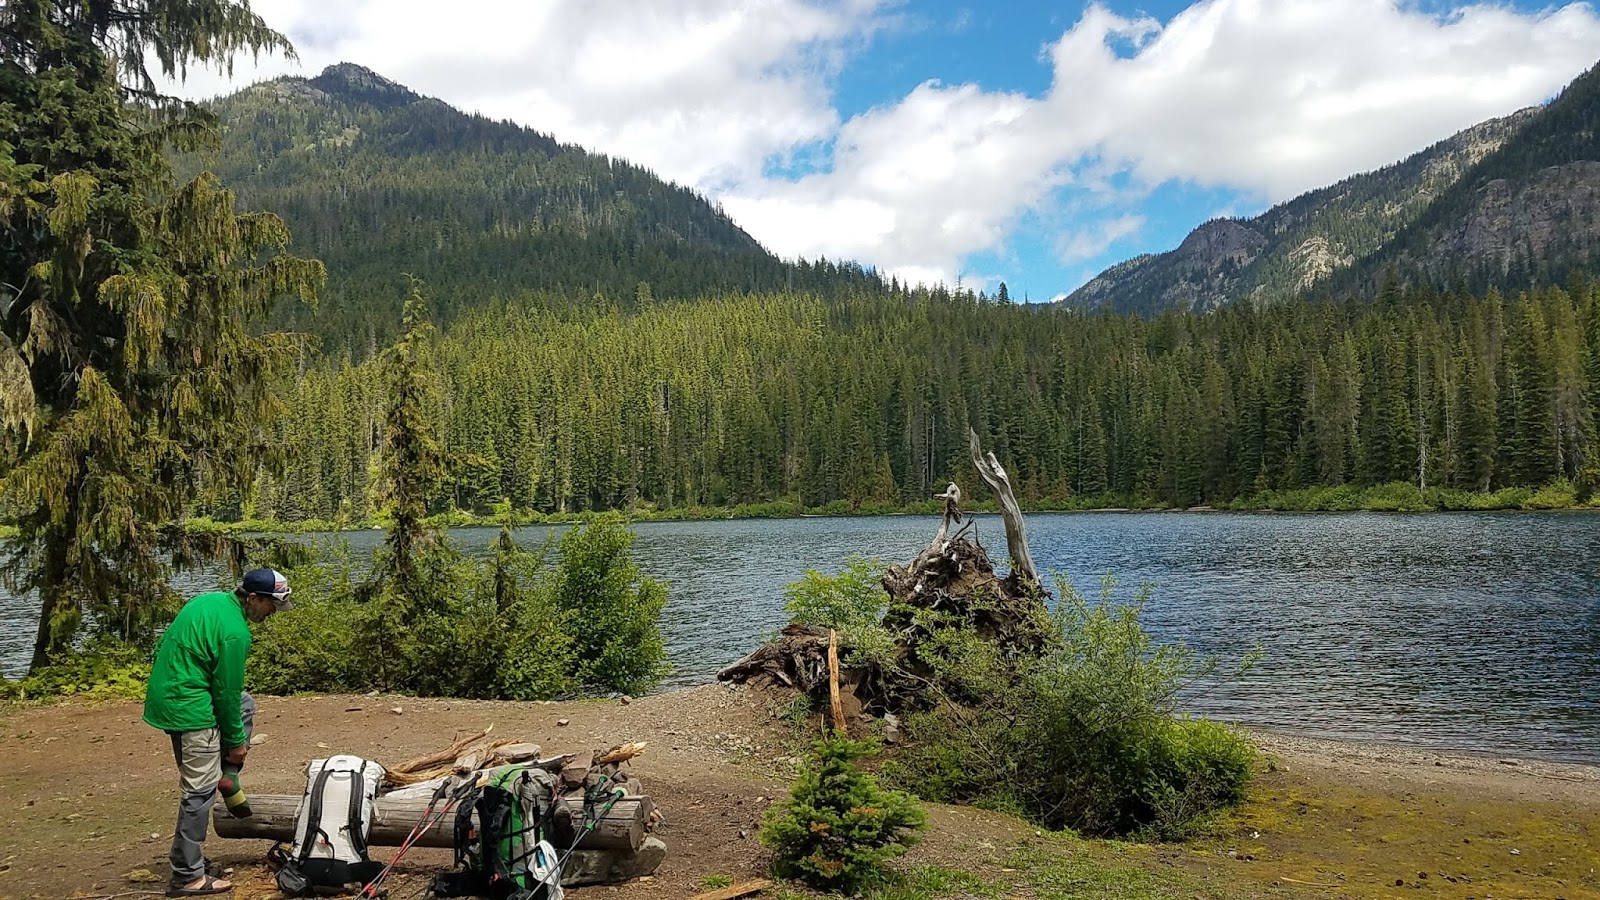
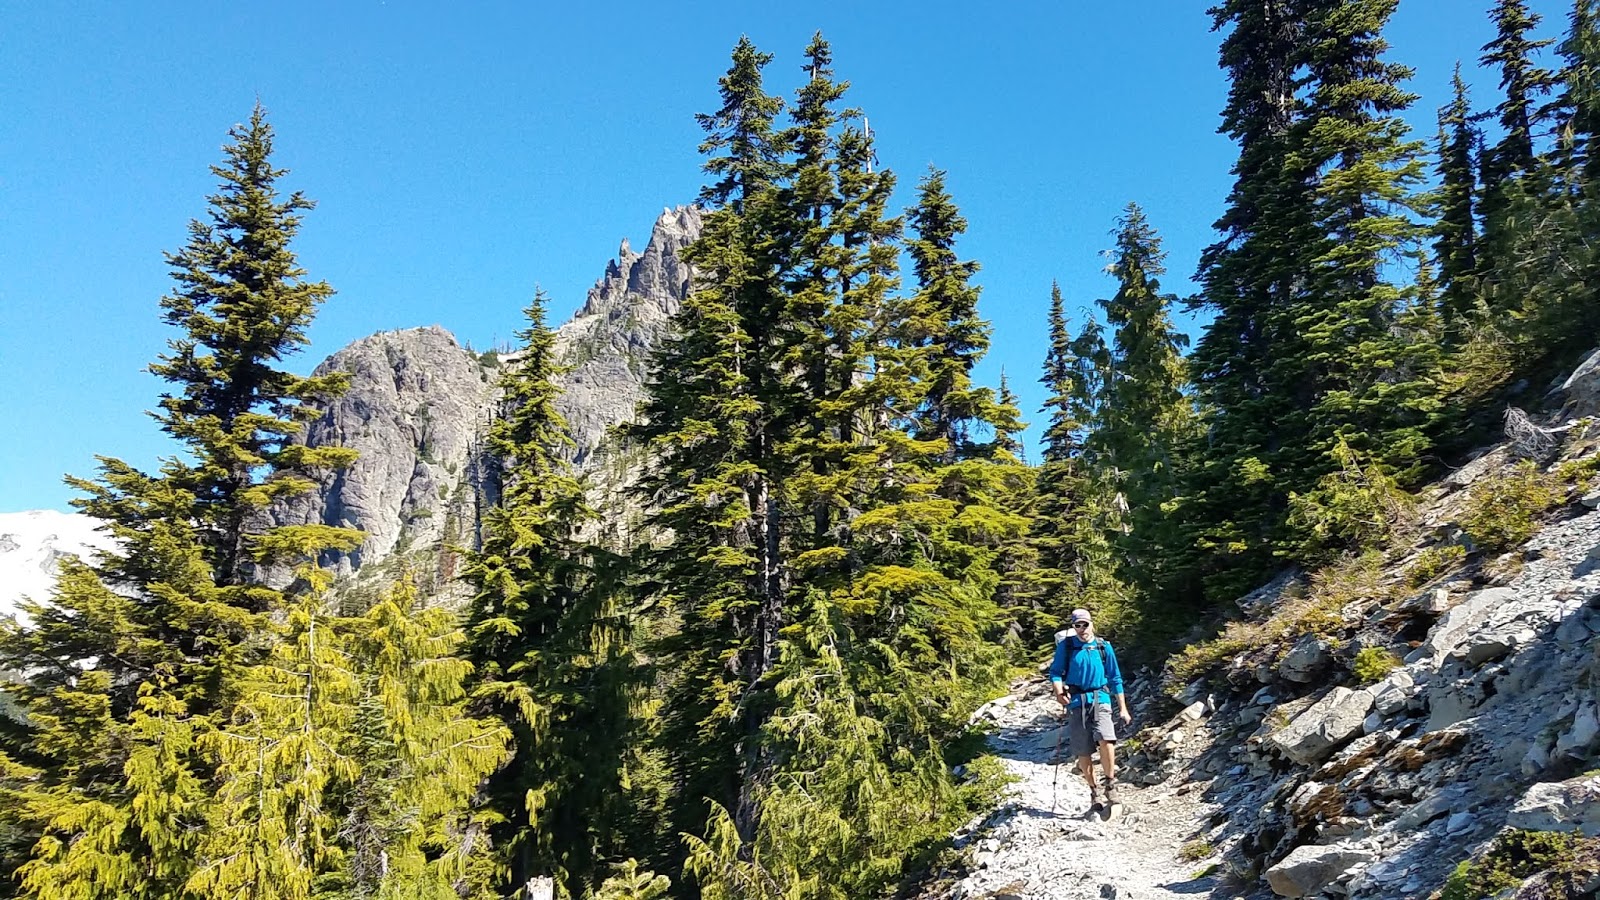
We huffed and puffed our way to Waptus Lake (on the PCT) and cached our boats.

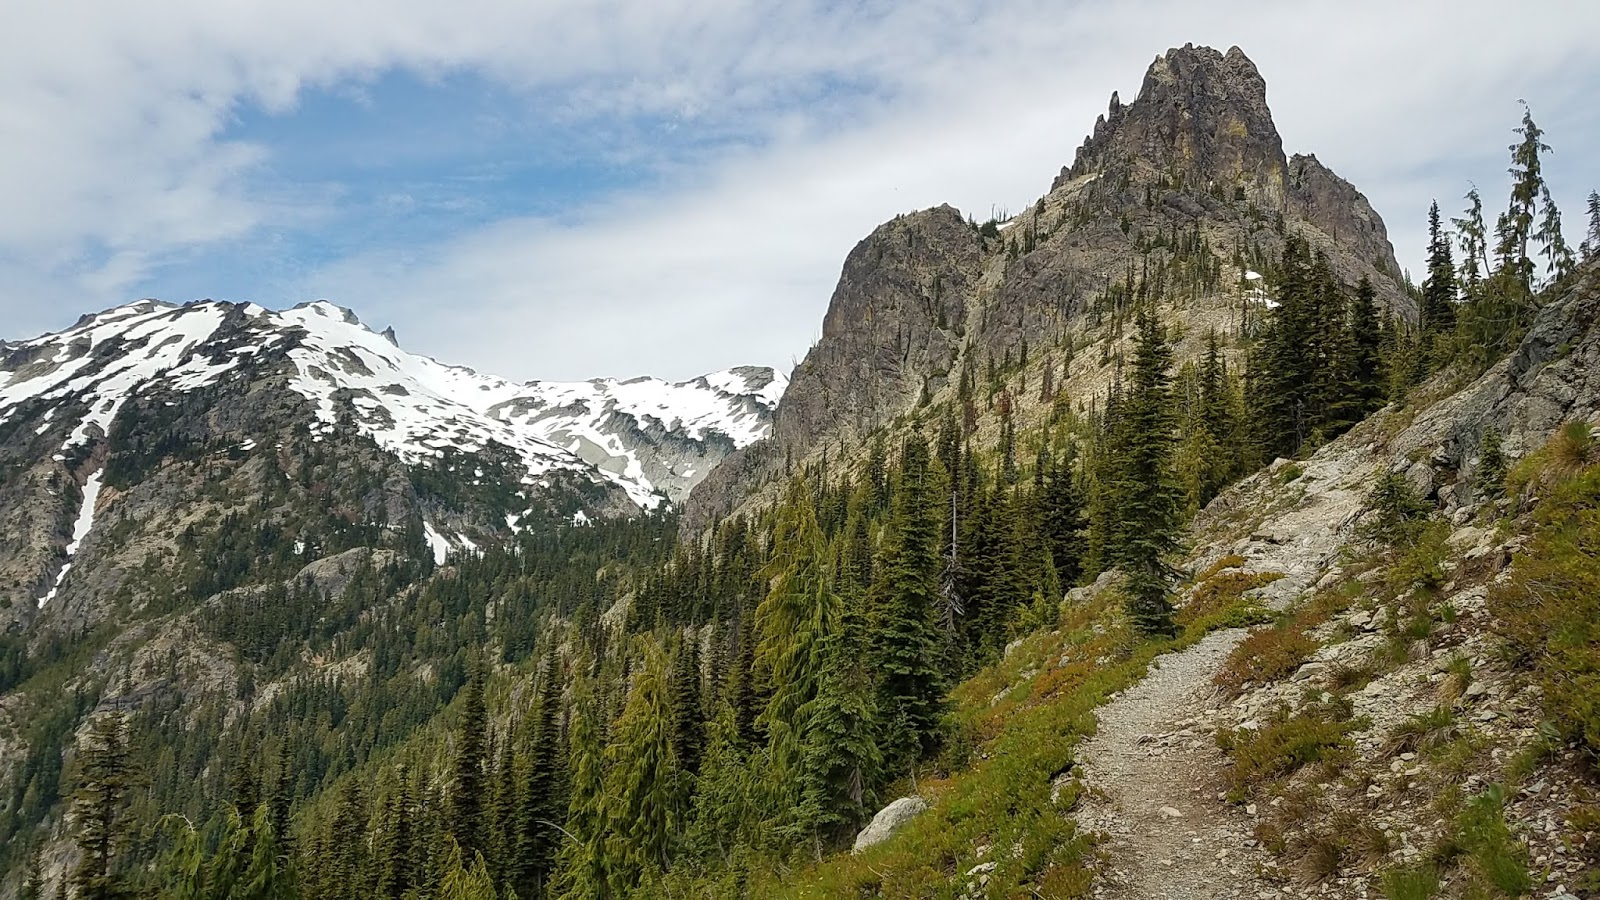
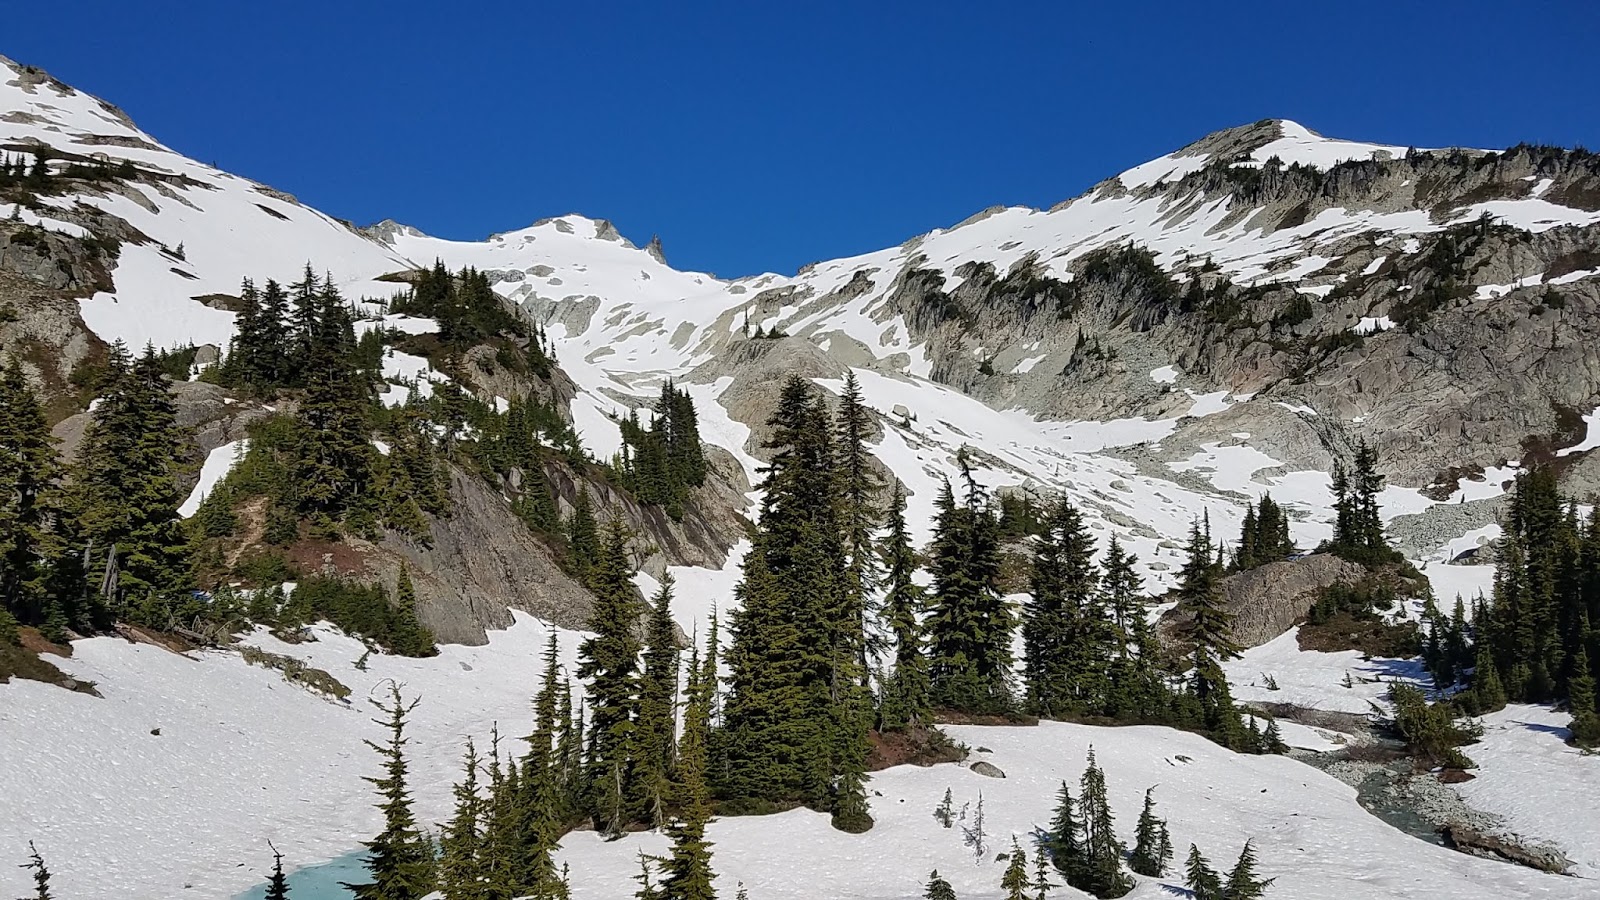
We spent the next few days hiking to some incredible lakes including Spade lake (holy cow, the trail goes straight up and reminded me of the Appalachian Trail…no switchbacks up the 2,000’ climb. Brutal.)

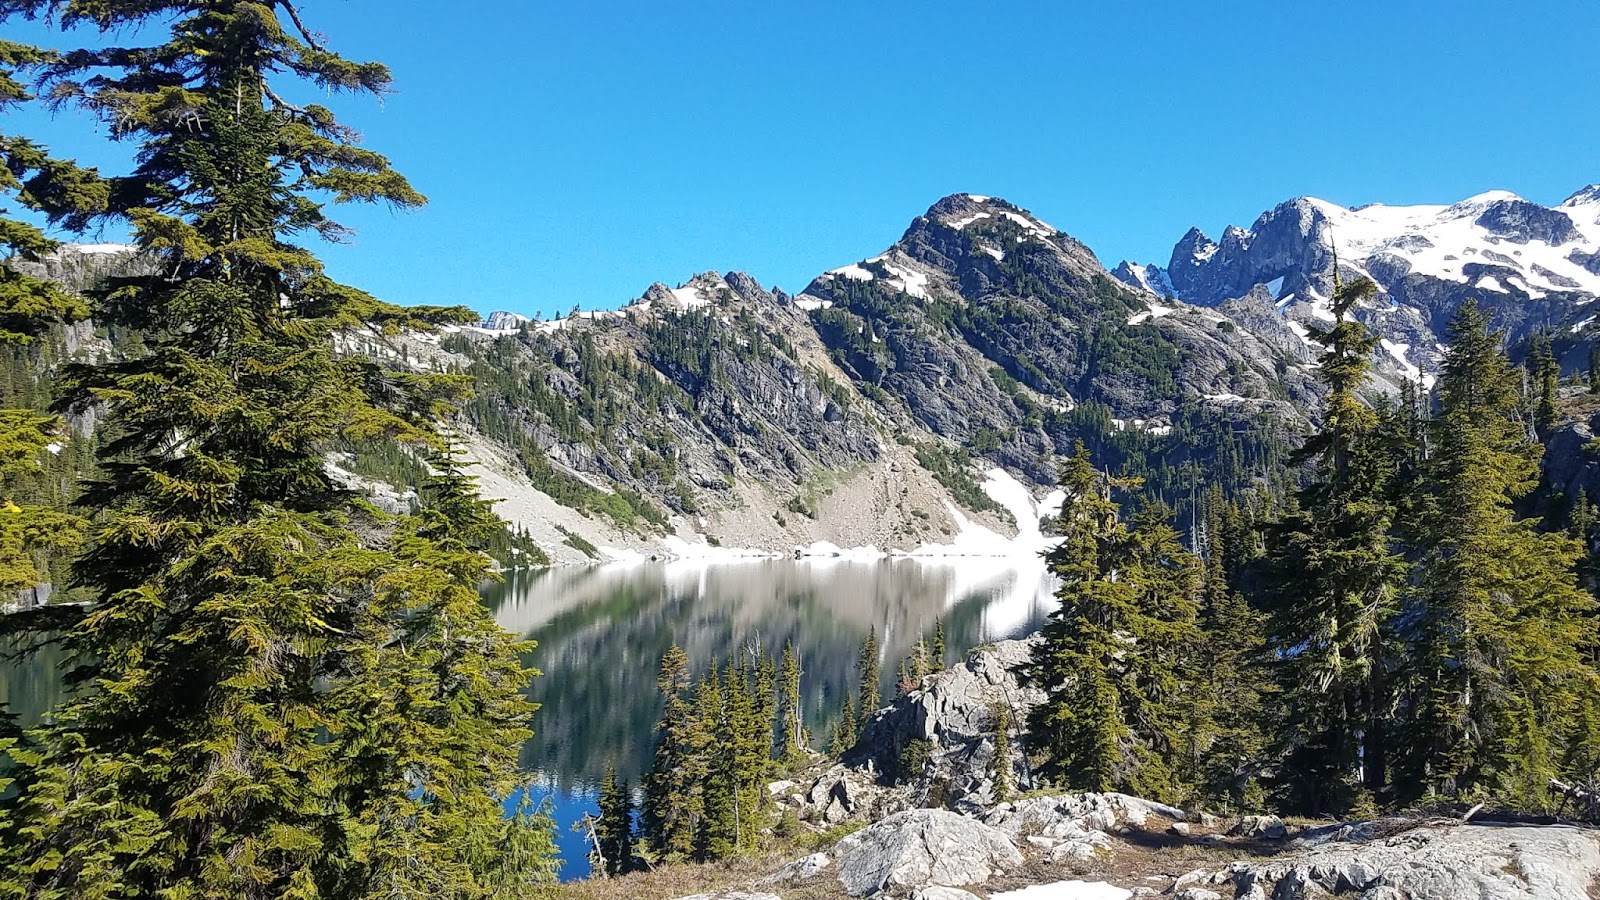
Then we went up to Deep Lake.

And Peggy’s Pond by Cathedral Pass. Wow!

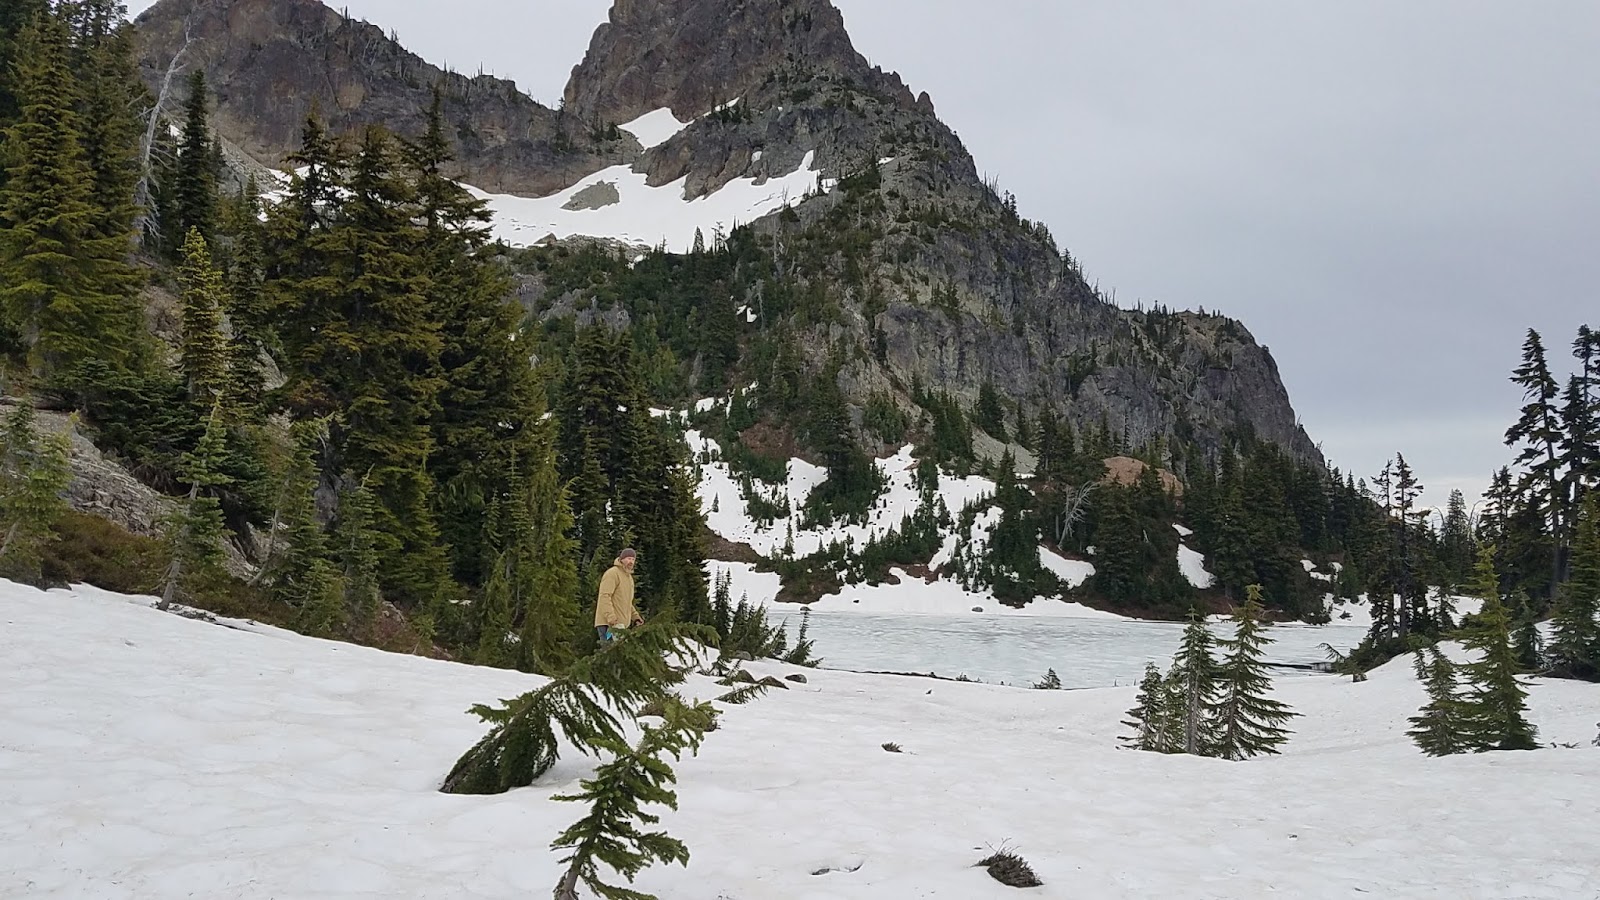
This was on the PCT but I didn’t remember any of it.

Peggy’s pond was still under snow but we found a dry patch under the towering Mt. Daniel for an incredible view. I must say, PCT hikers don’t know how good they have it. The minute the trail intersects a path that doesn’t continue to Mexico and Canada, the character changes immediately…no switchbacks, quick elevation changes, scree. But on the other hand it is efficient.

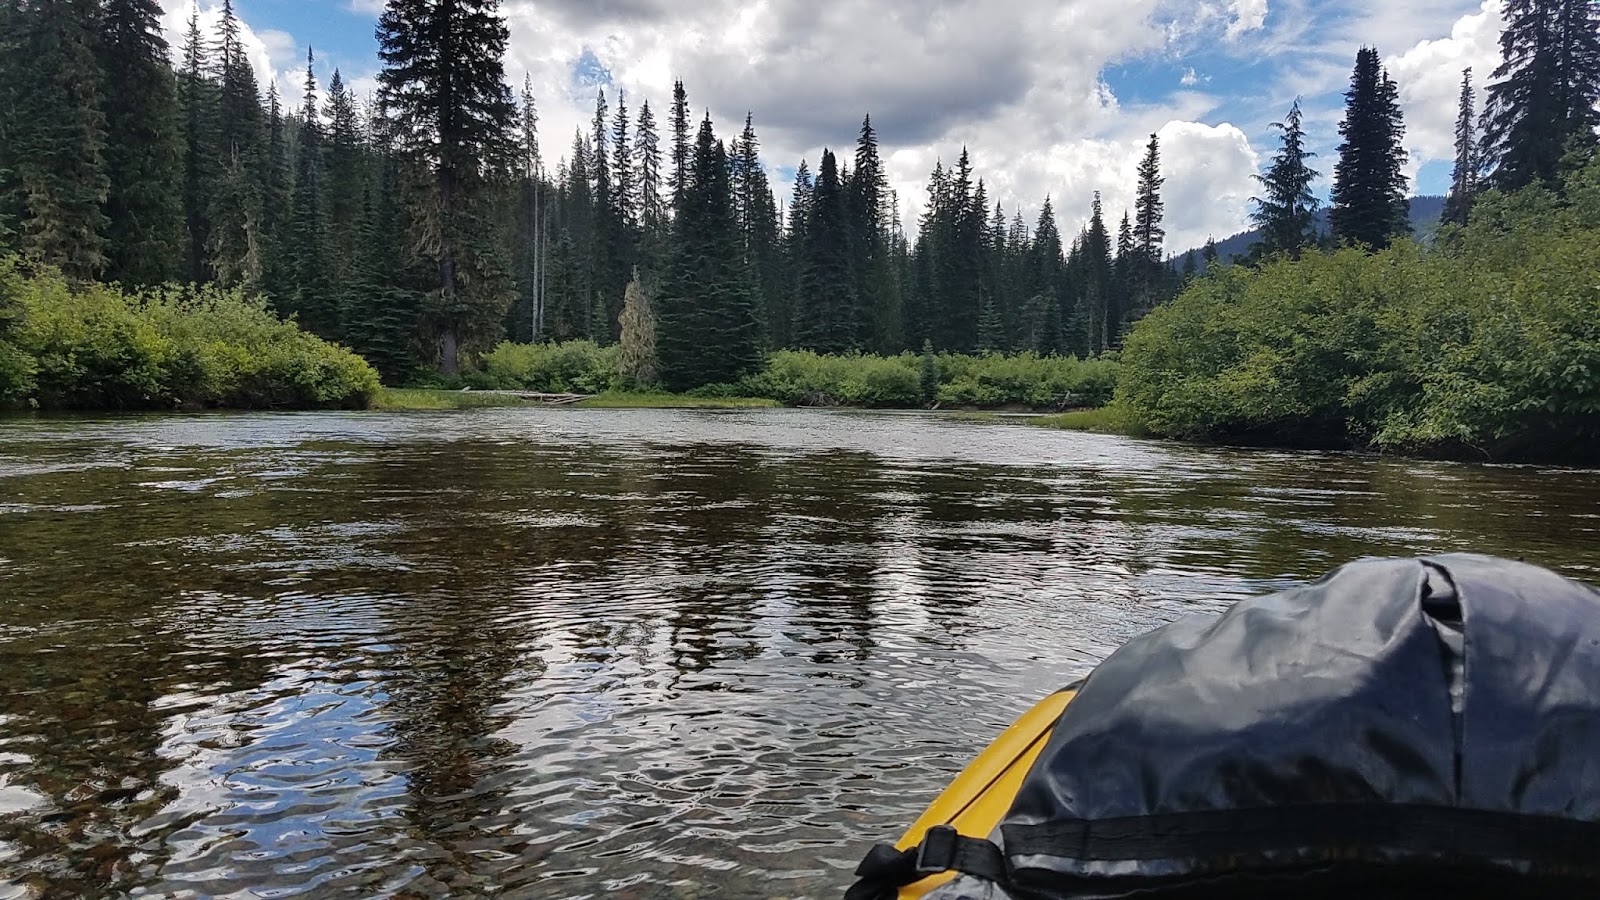
We made our way back to Waptus Lake and our boats on a hot sunny afternoon, so I had to dive into the lake. COLD. Yes the lake is fed by snowmelt, and yes it was unbearably refreshing. We inflated our boats and paddled around a bit and enjoyed the bliss after some pretty challenging backpacking.

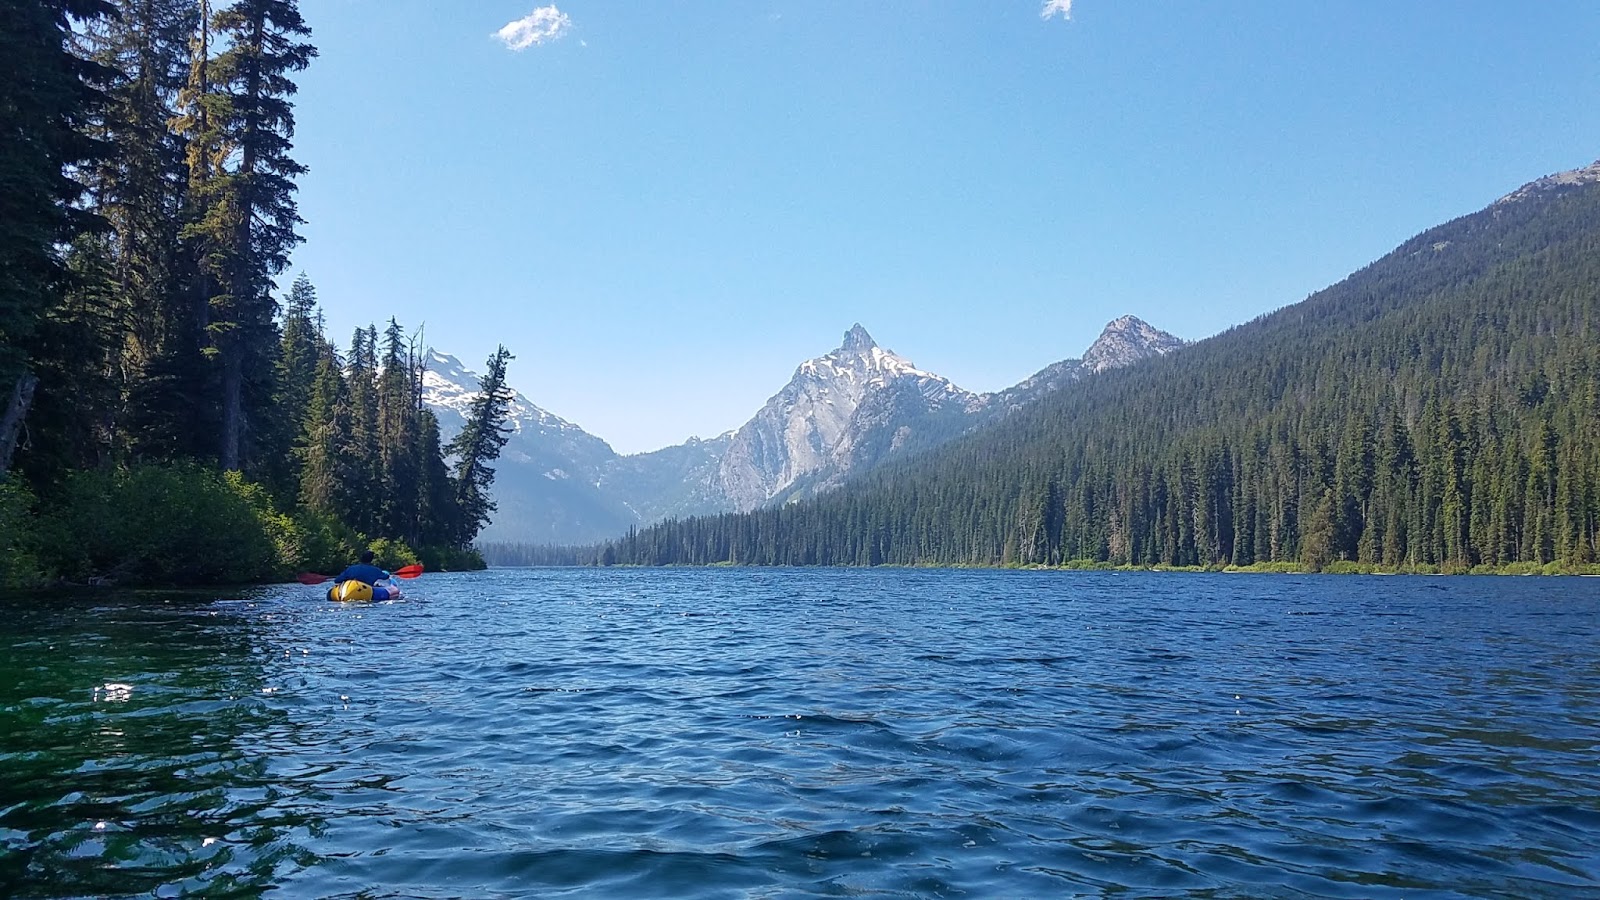
The next morning we loaded up the boats to see what Waptus River had to offer.

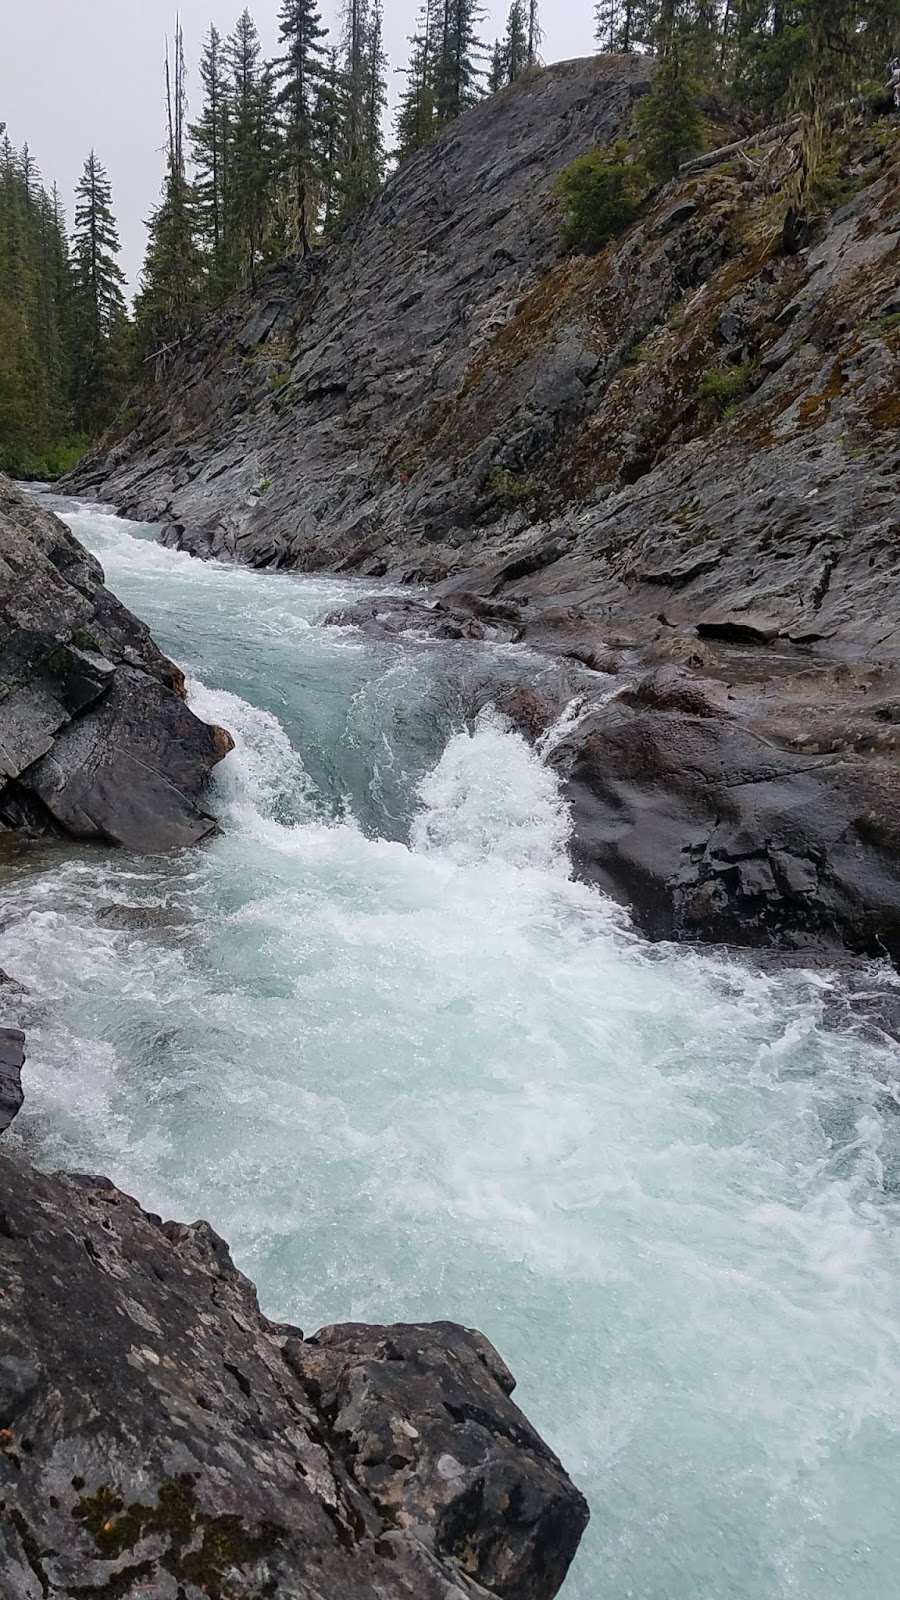
The calm and pleasant paddle out of the lake lasted about a mile before the first gorge.

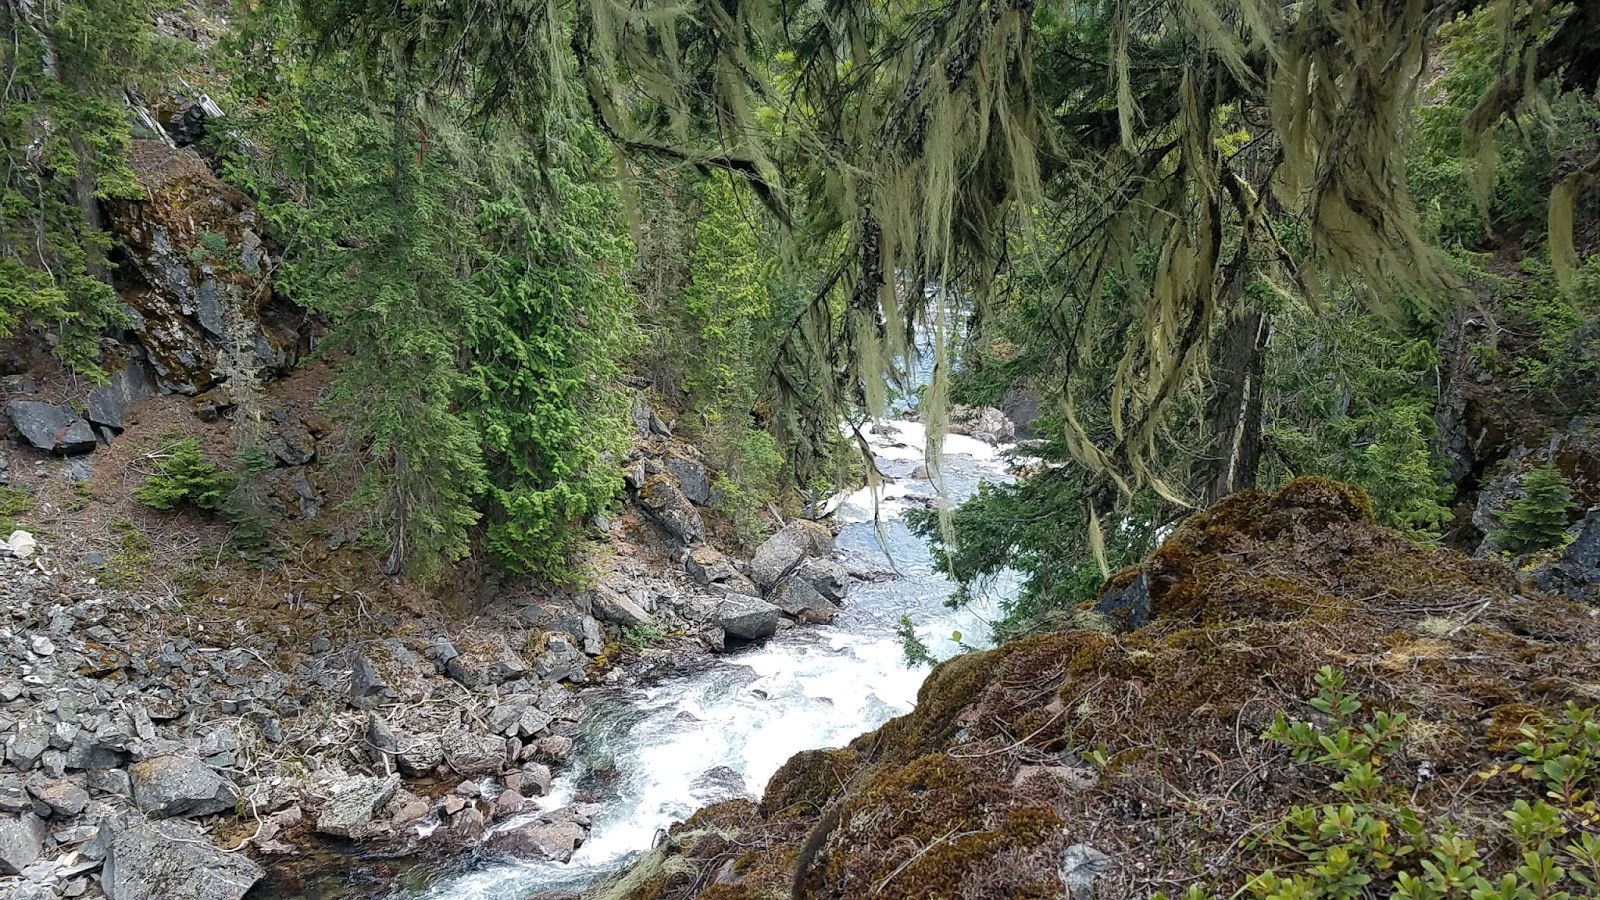
We got out river left to scout, and could tell the entrance was clean, but we didn’t climb the next bluff to see deeper into the canyon. It’s crucial to scout these places because they are so committing. Once in a granite gorge like this, there is no out. Often sheer cliffs prevent portages or walking around rapid, and narrow canyon walls can easily trap logs and make deadly barriers. So, since we couldn’t see farther in, we decided to do the smart thing and walk around.

The portage on river right looked more doable, so we picked up our fully loaded boats and walked around.

On top on the river right side we dropped boats to get a better look at the rest of the gorge, and to our dismay saw it was a go. The gorge was clean and runnable, but we were already mostly around and wouldn’t go back. Bummer, but we should have either taken the time to scout the whole thing, or be happy we made a smart choice with the unknowns we were facing.

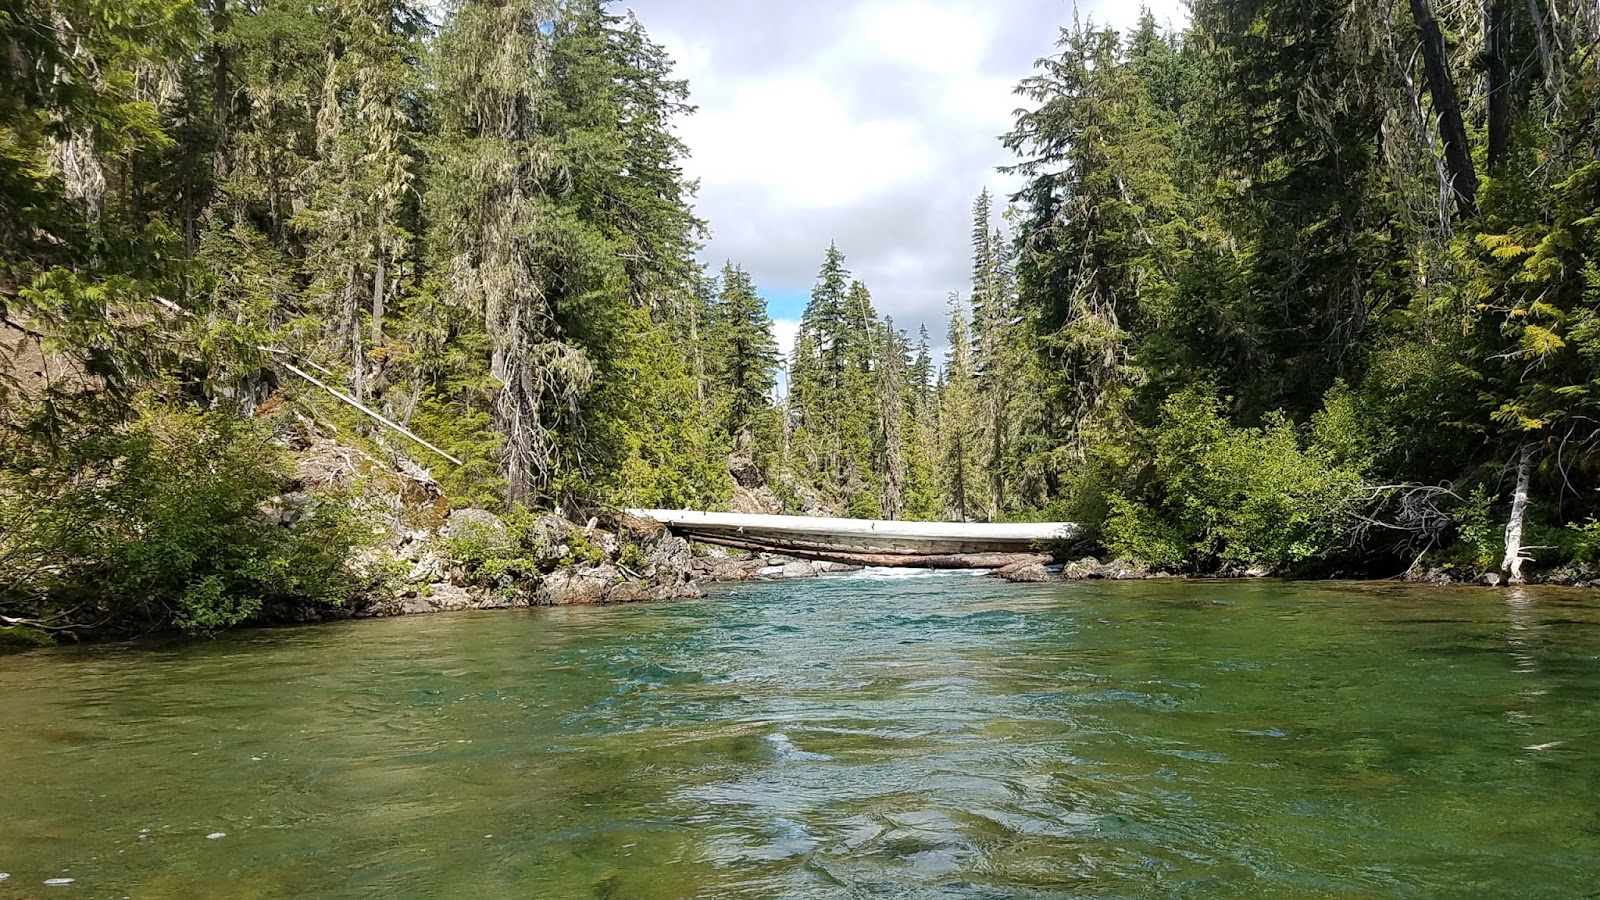
The next 4ish miles were a braided river channel complete with several knarly log jams and gorgeous deep aquamarine pools.

We huffed and puffed over the log jams and had several clear miles before the next gorge.

First we ran the granite slide and drop that we had scouted on the hike in. Fun!

We pulled over and had lunch, and decided to scout the next gorge, the whole gorge, this time. It looked to be about a mile long, so we left our boats and bushwhacked up and down the steep cliffs.

We were able look down the steep wooded slopes for most of it, and it was clean. No logs blocking the way, but a few of the rapids were in the Class IV/-V range with no portage  / scouting potential, and I didn’t feel comfortable running them.

Kirk wouldn’t boat it alone (any Class V packrafters out there that don’t mind some brutal backcountry wilderness river trips? Kirk could use a big water adventure partner). Anyway the whole gorge ended with a series of waterfall drops (35′ triple drop) that looked good if you had a hardshell (not so good for a packraft), but no way to set safety on the second crux drop of the triple drop .

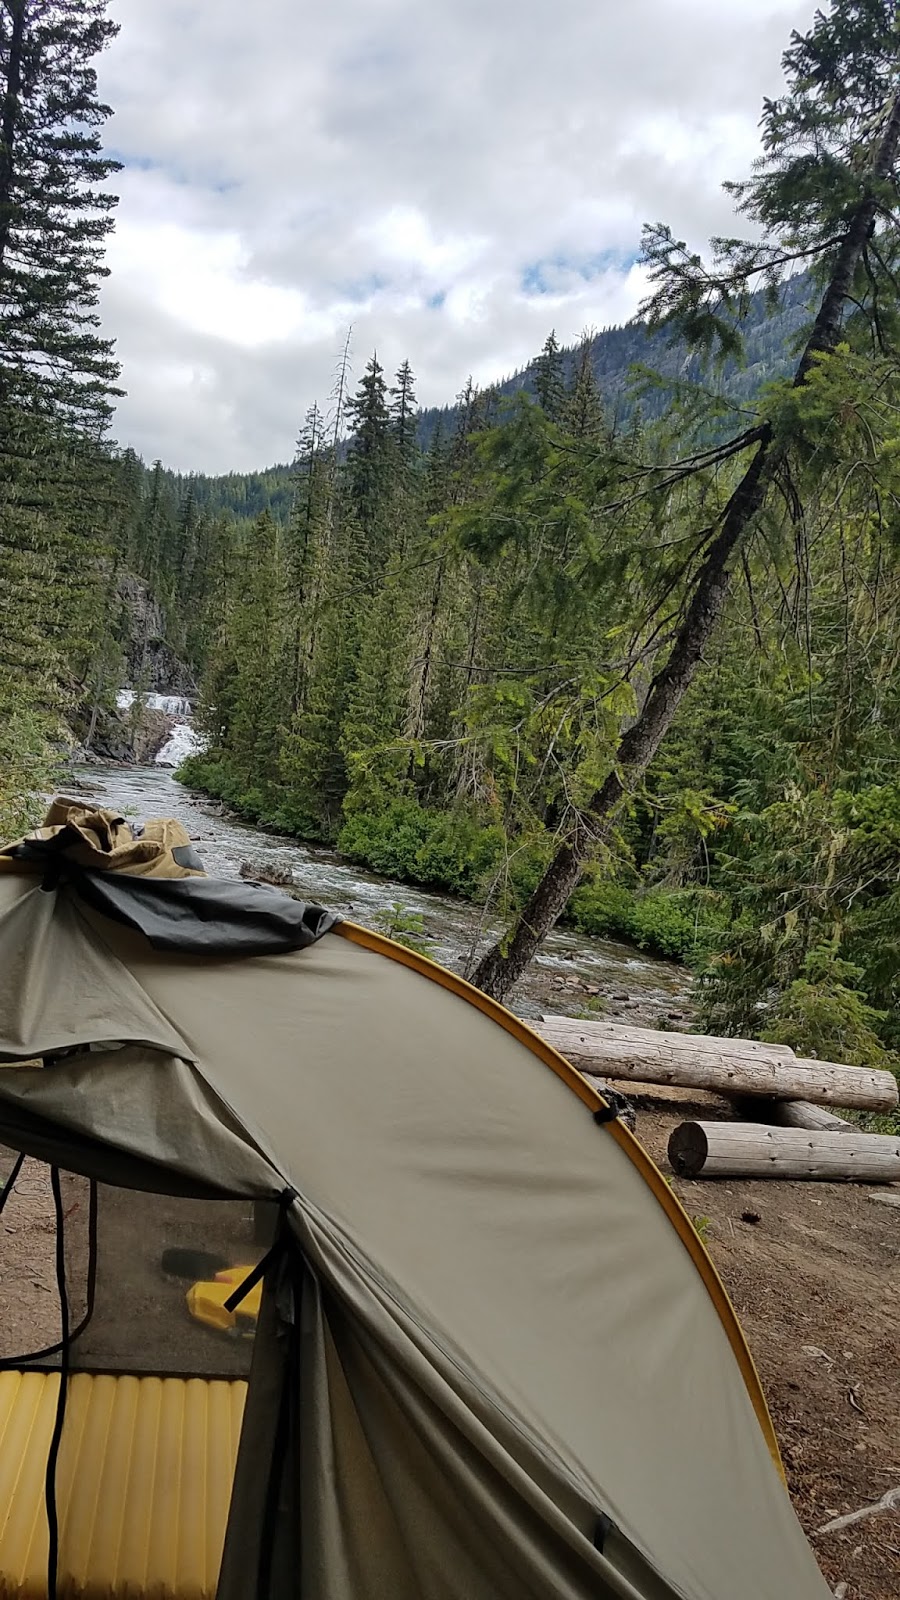
So we walked back to our boats while dodging a quick thunder storm, and picked up our boats to  make the whole journey back again.

We made camp with a view.

For our last day of paddling it appeared from the topo lines on the map that we might have another gorged section on our hands, but after launching that morning and padding for a short while, we realized the terrain wasn’t as narrowing as it looked, and it was all a go.

We were in some fun Class II/III water!

Beautiful pools of water peppered with fun rapids marked most of the run that morning. Towards the end of the run the drops started to get bigger, in the Class III+ range, but all were clean and good splashy fun.

I wore my gopro for the boating, so got a lot of footage of the river, stay tuned for a video!

Hiking a Route vs. Hiking a Trail: Part 2 – How to develop the skills for route-finding.

Part 2 of my Routes vs Trails is up on the MSR – Mountain Safety Research blog! Thanks to some badass fellow hikers, I think we came up with a good list of suggestions on how to progress your skills to start hiking more routes. Maybe I’m biased?? 🙂


My heart lurched as I scanned the snow-covered forest floor looking for any hint of a path through the trees. The hiker whose footsteps I was following knew where they were going, right? When those footsteps made an unexpected turn in the snow, doubt crept in. Had the footsteps lead me astray? Was I lost? I pulled the map from my pocket, determined that, wherever I was in this thick forest, if I headed north I would intersect a road…eventually. I followed my compass bearing for almost an hour before crossing a dirt road draped with melting patches of snow. Yes! I did it! Now I set to the task of finding my next landmark to figure out where on the map I had ended up. I’m not lost! Just not exactly sure where I am…

Route Finding | The Summit Regsiter
Photo by Quoc Nguyen

My backcountry navigating skills were put to the test again and again when I hiked the fledgling Arizona Trail nine years ago. Even though I was hiking a developing trail, many sections required route-finding. In times like these having the skills to find yourself again is crucial.

If you want to hike a route, you need a solid backcountry skill set. Developing those skills will open up new possibilities for spending extended time in the backcountry.

In part 1 of this series, we looked at the differences between a route and trail. Now, we’ll look at how to acquire the route-finding skills needed for that off-trail hiking.

As the Oregon Desert Trail Coordinator, I spend a lot of time helping people feel comfortable and confident with off-trail travel. For this piece, I polled some of the most accomplished route creators and hikers I know for their advice. Liz “Snorkle” ThomasCam “Swami” HonanJustin “Trauma” LichterSage Clegg, and Paul “Mags” Magnanti all have extensive experience and play an active role in educating hikers new to the trails and the backcountry.

How to develop your skills

  • Take a navigation class: Learning how to navigate with a map and compass from an experienced instructor is a great start. Your options include watching online tutorial videos, taking a class at your local outdoor store, and signing up for a guided field trip.
    Route Finding | The Summit Register
    Photo by Renee Patrick

Trauma took an outdoor education class in college that had him wandering around the canyon country of southern Utah for three months, for which he got college credit. Sage learned to use a map and compass at 14 when she enrolled in an Outward Bound course. Mags took an Appalachian Mountain Club course in “the wild, remote lands of Rhode Island” just prior to his AT thru-hike.

  • Practice: “Once you feel comfortable with the basics, it’s time to use those skills,” explains Mags. Practice your navigation. Then practice again BEFORE you head out on a challenging route.
    • Practice on trails: “To learn, I always carried a map on hikes that are ontrails, and frequently checked the map to make sure I always knew about where I was,” Snorkle says. “Following along on the map, I got a feel for how topo lines translated into hills or ridges so when I really needed those skills, like on cross-country sections or when the trail disappears, I had a better idea.”
    • Practice NEAR trails or very visible landmarks: “Practice in a place you can fail,” Sage suggests. “Go off-trail between two easy-to-find ‘handrails’ like a river and a road, or between two established trails. If you get off course you can always bail to familiar turf by traveling towards the handrail.”
    • Practice micro-navigation: The art of making small route choices on the ground, or “micro-navigation” is just as important as the skills you learn in navigation classes. “What is the best way to get around that gap before the pass? Should I go left or right on the talus slope? This type of navigation mastery can only come with experience,” Mags explains.
    • Practice in an urban setting: Snorkle suggests, “Put together a complicated walking route with lots of turns, go for a trip, and practice with a paper map. If you’re really lost, you can always check your phone or find a ride home.”
  • Anticipate the terrain: Beyond knowing where you should be on the map now, look ahead and predict what you will do next. Will you cross a creek right before you need to make your turn? You can be on the lookout for the creek that will indicate your next move. Study your maps right before your hike to get a lay of the land, and repeat at each break.
  • Go with more experienced people: “I started hiking off-trail before I was ever a thru-hiker,” Snorkle says. “I went with more experienced hikers, watched what they did and learned from them. I followed along on my own maps, made educated guesses, and then checked in with them for confirmation.”
  • Learn on maps before GPS: GPS devices and smart phones have become incredibly common and utilitarian, especially when hiking off-trail. However, it’s still important to have the analog skills of map reading and navigating. Devices can break, technology can lead you astray; it’s vital to always carry paper maps and know how to use them.
  • Scout the route before your hike: Swami says, “I’ll go over my proposed route several times, identifying notable landmarks, challenging stretches, potential camping areas and possible exit routes in case of an emergency.” If your route has a GPS track, upload it to Google Earth and review the trip with detailed satellite imagery.
    Route Finding | The Summit Register
    Photo by Sage Clegg
  • Build skill development into your objective: “Each adventure can be a learning experience, as much as it is an opportunity to visit a new place,” Trauma explains, “I try to add a skill that I can improve on into the core goal for each trip I take. This also helps create a challenge that keeps me interested and inspired.”

Other considerations

  • Take extra safety precautions: “Prior proper planning prevents piss poor performance,” Trauma advises. Err on the side of caution regarding the amount of food, water, clothing you will carry and the distance you plan to travel per day. On routes, these variables are often quite different from backpacking on an established trail. “I leave a detailed description of my proposed route with friends or family before setting out,” Swami says. “Consider carrying a personal locater beacon, such as a SPOT or Garmin inReach.”
  • Be aware of private public land issues: It is your responsibility to know the rules and regulations on public lands, Each land management agency has different protocols regarding caching, permits, access and more. Do your homework. It is also your responsibility to know how to avoid going on to private land. Not all fences indicate private land, and not all private land is fenced. Many GPS apps have private land layers, and hunting unit paper maps often show private land parcels.
    Route Finding - The Summit Register
    Photo by ONDA
  • Be willing to adapt: “Mother Nature doesn’t have a copy of your itinerary,” Swami likes to say. “The keys to hiking a route are preparation, adaptability and objectivity. If you aren’t sure that a particular area will be navigable, have a Plan B. Never be too wedded to a particular course.” Carry a map of the entire area you’ll travel through, so you’re able to find a new route if plans change.

Once you have the experience and skill level to head off the beaten path, being successful in remote backcountry settings falls to making good decisions. Listen to your body, observe the terrain and weather, carry the resources you need to make route decisions in the field, and remember to enjoy yourself! Taking a rest day, or a side trip for ice cream, are good decisions if they keep your morale high and your feet happy.

When you’ve mastered your backcountry skills, I hope to see you out on the Oregon Desert Trail! This 750-mile route through the most scenic places in Oregon’s high desert will challenge – and reward – you.

Route Finding | The Summit Register
Photo by Randy Aarestad